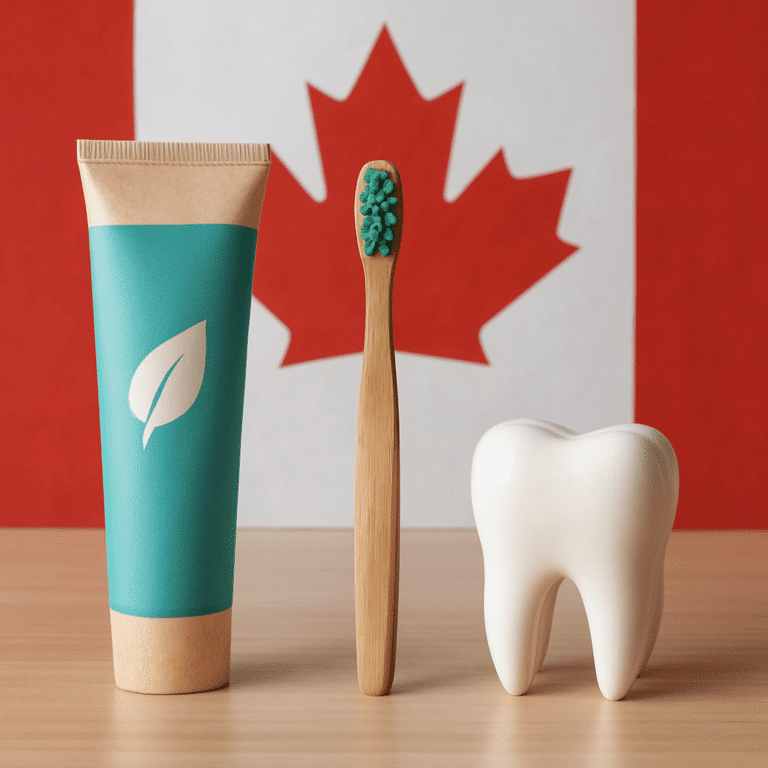
Skin Care in Canada: Where to Buy the Best Canadian Brands and How to Choose the Right Routine
If you care about authentic skin care canada options that actually work in our climate, stop guessing at labels and shopping by buzzwords. This guide shows where to buy trusted Made-in-Canada brands, how to verify origin and certifications, and how to build a practical morning and evening routine for winter, summer, and common skin types. You’ll also get a seven-step plan to test and switch products safely without blowing your budget.
Why choose Made-in-Canada skincare and what to expect
Key point: Buying Made-in-Canada skin care often gives real advantages beyond patriotism – better supply chain visibility, formulations tuned for cold-dry winters, and faster customer service when something goes wrong. Smaller Canadian makers also tend to move quickly on reformulations and transparent ingredient lists because they sell direct to consumers rather than through opaque global distribution.
Regulatory context: Health Canada requires cosmetic safety compliance but does not certify a product as Canadian made. Use company disclosures and third-party certifications to confirm origin rather than assuming packaging promises are definitive. For clarity on regulations see Health Canada Cosmetic Safety and labelling guidance from the Competition Bureau.
What made-in-Canada usually looks like in practice
- Manufacture or packaging site listed: many legitimate brands publish a Canadian address and where the product is filled or packaged
- Ingredient sourcing statement: expect clarity about which botanicals or actives are imported versus sourced domestically
- Third-party badges: certifications such as COSMOS, Ecocert, Leaping Bunny, or B Corp are useful signals when brands also name their manufacturing partner
Tradeoff to remember: Smaller Canadian brands can offer fresher stock and more transparency but often at higher price and limited distribution. Also, Made-in-Canada can mean final assembly happened locally while key actives were produced elsewhere. Expect a spectrum rather than a binary label.
Concrete example: A person with chronically dry winter skin switches to a Canadian ceramide-rich moisturizer from a local apothecary. The brand lists its packaging facility in Ontario and provides batch codes on its site, so the shopper can confirm fresh stock and contact the maker directly when a texture or scent changes. That direct line shortens troubleshooting compared with buying the same product through a large cross-border marketplace.
Practical insight: Do not equate natural or local botanicals with better barrier repair. For Canadian winters prioritize proven humectants and occlusives – ceramides, glycerin, squalane, petrolatum – regardless of marketing. Natural extracts are fine for scent or niche benefits but they do not replace clinically effective hydrators.
Where to buy trusted Canadian skincare online and in person
Direct brand sites and DTC stores: Buying straight from a Canadian brand is the clearest route to provenance and ingredient transparency. Most legitimate makers publish manufacturing or packaging details on their About or FAQ pages, and customer service can confirm batch codes or sourcing if you ask. Tradeoff: direct sites often have smaller selection, fewer discounts, and longer shipping times to remote provinces compared with large marketplaces.
Online marketplaces and curated shops
Curated marketplaces (good balance): Platforms that vet sellers, like Bri's Bazaar and specialized Canadian marketplaces, reduce the time you spend verifying origin. They compile ingredient lists, call out certifications, and often offer bundles or sampling options. Limitation: curation helps but does not replace checking a product page for manufacturing addresses and third-party badges.
Large national retailers (convenience vs verification): Chains such as major drugstore and beauty retailers offer wide selection, easy returns, and in-store testing. They are convenient for sunscreen, cleansers, and basics. Judgment: use them for accessibility and samples, but cross-check the brand site for Made-in-Canada claims before assuming origin.
In-person options: boutiques, spas, and markets
Local boutiques and apothecaries: Small retailers often stock local apothecaries and indie Canadian labels and will let you test textures and get staff recommendations. They are the best place to evaluate moisturizers for winter barrier support. Tradeoff: selection is curated and seasonal—you may need to order online if a product sells out.
Farmers markets and indie makers: Buying direct from artisans gives the best opportunity to ask about formulations, ingredient origins, and packaging practices. Caveat: small-batch claims require scrutiny—ask about GMP practices and where actives are sourced.
Be wary of big cross-border marketplaces and resellers: Sites that ship into Canada or third-party sellers on large platforms can introduce counterfeit risk, mismatched formulations, or expired stock. If price looks too good, verify batch codes and seller information before purchase.
- Quick buying checklist: Check for a Canadian business or manufacturing address on the brand site
- Quick buying checklist: Look for at least one third-party certification (COSMOS, Leaping Bunny, B Corp)
- Quick buying checklist: Confirm return policy and shipping/duty to your province
- Quick buying checklist: Ask for sample or travel size to patch-test before committing
Concrete example: A Vancouver resident wants a mineral SPF that is gentle on rosacea. They visit a local apothecary to feel textures, scan the product QR code to pull up the brand site, and then order a travel size directly from the brand to confirm batch and packaging details. This approach gives immediate tactile assessment plus provenance verification before buying a full-size tube.
Practical judgment: No single channel is perfect. Use direct brand sites for transparency, curated marketplaces for time-saving vetting, and in-person stores for texture and sampling. Always cross-reference the product page against the brand's About or FAQ, and when in doubt contact the brand; responses (or lack of them) tell you more about trustworthiness than marketing copy.
How to verify a product is truly Made in Canada
Direct proof matters more than marketing copy. A Made in Canada claim can mean final assembly, fill-and-finish, or a genuinely Canadian-formulated product; your verification should identify which one you care about and then follow the trail to that specific fact.
Three practical steps to verify origin
- Locate the physical site: Find where the product is made, filled, or packaged by checking the product label, the brand About/FAQ pages, or downloadable product PDFs. If the site only says Imported or Distributed by with a Canadian office, that is not manufacturing proof.
- Request manufacturing details and batch codes: Email the brand a short question: Where was this SKU formulated? Who fills or packages it? Can you confirm the batch code on the tube I bought? Reputable brands will supply a facility name or Certificate of Analysis on request. Lack of reply is a signal to be cautious.
- Verify third-party documentation: Look beyond badges. Click certification links (COSMOS, Ecocert, Leaping Bunny, B Corp) to confirm the certification covers the specific product and manufacturing site, not just the company headquarters. Use Health Canada guidance and the Competition Bureau advice to understand allowable origin claims.
What to ask and why it matters. Two short, revealing questions: Is the formula manufactured in Canada or only packaged here? Where are the key actives sourced? Answers separate PR from provenance — formula origin matters for formulation control, ingredient sourcing matters for sustainability and supply-chain risk.
Concrete example: A Toronto shopper considers a vitamin C serum labeled Made in Canada. The product label states Packed in Ontario; the shopper emails the brand asking where the concentrate was sourced and which facility bottles the SKU. The brand replies with the Ontario contract manufacturer name and a COA showing the active was produced overseas but blended and bottled locally — the shopper buys knowing the formulation control is local even if an active ingredient traveled.
A practical trade-off to accept. Many small Canadian brands rely on overseas suppliers for actives and domestic partners for fill-and-finish. That arrangement is acceptable if the brand is transparent and provides testing or batch traceability. If your priority is local sourcing for carbon footprint reasons, insist on named ingredient origins; if your priority is formulation tuned for Canadian climates, prioritize local formulation and small-batch filling.
Next consideration: when the product arrives, check the batch code against the brand reply and patch test before adding it to your routine.
Building a Canadian-friendly skin care routine by skin type
Start with layering logic, not product names. Think in four practical layers: a gentle cleanser, a targeted active, a barrier-focused moisturizer, and a final protective layer (daytime: sunscreen; night: occlusive when needed). In Canada the layering order stays the same year-round — what changes is the texture and concentration of each layer to match cold, dry winters and variable summers.
Morning and evening pattern (practical steps)
- AM: Cleanse lightly with a non-stripping formula → apply antioxidant or hydrating serum such as a vitamin C serum Canada option → lock in with a moisturizer chosen for your skin type → finish with a broad‑spectrum SPF (mineral for sensitive or snow-reflective conditions).
- PM: Remove sunscreen/makeup thoroughly → use a treatment product if prescribed or tolerated (salicylic acid, niacinamide, or a low-strength retinol) → richer moisturizing step that emphasizes ceramides/glycerin/squalane → optional occlusive balm overnight on cheeks or lips in winter.
Trade-off to accept: stronger actives like retinol or high-dose AHAs speed results but increase barrier damage risk in cold months. For most Canadians it pays to dial actives back in November–March and prioritize repair ingredients; you can ramp up active frequency in spring when humidity improves.
Skin type prescriptions — what to pick and what to avoid
Dry or barrier-compromised: prioritize humectants and occlusives. Look for ceramides, glycerin, hyaluronic acid, squalane, and a petrolatum or beeswax occlusive at night. Limitation: heavy occlusives can feel uncomfortable in humid summer months, so use conditionally.
Oily or acne-prone: prefer lightweight, non-comedogenic hydrators and oil‑regulating actives like niacinamide and salicylic acid. Caveat: aggressive drying cleansers create rebound oil and inflammation — that worsens acne long term.
Sensitive or rosacea-prone: choose fragrance-free, minimal-ingredient formulas and mineral sunscreens. Avoid highly concentrated botanical blends until tolerance is proven; natural does not equal gentler.
Mature or anti-aging focus: include antioxidants in the morning and a retinoid option at night, introduced slowly. In winter use lower frequencies and pair retinol with robust barrier support to avoid excessive flaking.
Concrete example: A Calgary commuter with combination skin swaps her summer gel moisturizer for a lightweight cream containing ceramides and squalane before winter. She keeps a niacinamide serum for pore control twice weekly and uses a mineral SPF daily to protect against UV and reflective snow. The result: fewer winter flares without sacrificing oil control in the T-zone.
Always keep a simple repair product on hand: a ceramide-rich cream or balm will fix most cold-weather flare-ups faster than adding more actives.
Addressing common Canadian skin concerns with targeted products
Direct point: In Canada the most reliable way to stop recurring flares is to match the problem to a product class, not a trend. If you treat barrier failure with lightweight serums alone, you will lose ground fast in winter; conversely, slathering heavy occlusives in summer creates breakouts for some. This section focuses on pragmatic product matches specific to Canadian climates and provides tradeoffs you need to accept.
Targeted product matches for frequent concerns
- Cold-weather barrier repair: Use a ceramide-rich cream plus a nightly occlusive balm. Look for moisturizer formulations containing ceramides, glycerin, squalane and a petrolatum or beeswax occlusive. Tradeoff: heavier textures are excellent for repair but can feel greasy and are unnecessary in humid months.
- Mask-related irritation and dermatitis: Switch to fragrance-free cleansers and a minimal-ingredient barrier serum with panthenol or colloidal oatmeal; consider a low‑dose azelaic acid cream for redness. Limitation: active anti-inflammatories require patch testing to avoid additional irritation under occlusion.
- Hyperpigmentation and dullness: Pair a stable antioxidant in the morning, such as a proven vitamin C serum Canada option, with regular, gentle chemical exfoliation (low-strength AHA or PHA) and nightly niacinamide. Consideration: aggressive exfoliation while the barrier is weak will worsen discoloration.
- Rosacea and reactive skin: Prioritize mineral sunscreen for face and products labeled fragrance-free and low-irritant. Use calming ingredients first — e.g., azelaic acid or allantoin — before introducing other actives. Judgment: many natural botanical blends claim soothing properties but increase flare risk for rosacea.
- Acne and oiliness: Target with salicylic acid cleansers, topical niacinamide and lightweight, non-comedogenic hydrators. Reserve retinol cream Canada for gradual introduction and focus on barrier support during the ramp-up period. Tradeoff: retinoids improve texture but increase dryness and sensitivity, especially in cold months.
Concrete example: A Winnipeg nurse with chronically chapped hands and flaky facial patches added a Canadian ceramide moisturizer and a small overnight petrolatum balm to her routine. She removed alcohol-based toners, used a mineral sunscreen daily for outdoor shifts, and swapped a harsh physical scrub for a weekly PHA. Within three weeks she reported fewer flares and could tolerate a low-dose vitamin C serum in the morning.
Practical insight and judgment: Consumers often overvalue serums and underinvest in moisturizers and sunscreen. In our climate, the biggest returns come from a reliable day moisturizer with SPF and a robust night barrier repair product. If you must prioritize budget, spend on a quality moisturizer for dry skin Canada and a proper sunscreen for face Canada before boutique actives.
If you have one product budgeted for the season, buy the moisturizer or sunscreen that prevents damage rather than another trendy serum.
Shopping smart: budget, sample strategies, and sustainability
Practical starting point: if you must cut your shopping list, buy the product that prevents damage rather than the product that promises change. In Canada that usually means a reliable daytime moisturizer with SPF and a solid night barrier cream before a boutique serum.
Budget tiers and where to allocate money
| Budget level | Where to shop | Smart purchases |
|---|---|---|
| Tight budget | drugstore ranges and discount sections at national chains | basic mineral SPF and a ceramide-based day cream; choose multi-use items to reduce cost-per-use |
| Balanced | curated marketplaces and brand DTC sites | buy travel/sample sizes of actives, full-size moisturizer from a Canadian maker, consider a subscription for staples |
| Invest | specialist apothecaries and small Canadian brands with refill programs | longer-lasting concentrated formulas, refill packs, lab-tested serums for a single key concern |
Tradeoff to accept: cheaper products can be fine for cleansers and non-active hydrators, but skimping on sunscreen or a repair moisturizer creates repair costs later – higher dermatology bills and more product replacements. Consider cost-per-use and shelf-life, not sticker price alone.
Sampling strategies that actually reduce waste and risk
Use travel sizes, decants, and structured trials. Ask brands for a travel or sample size before buying full strength. If travel sizes are unavailable, request a decant for a week of use; many small Canadian makers will oblige. Keep one product variable at a time and photograph skin at day 0, 7, and 14 to judge tolerance objectively.
A real use case: A Halifax buyer wanted a Canadian vitamin C serum but could not justify a full bottle. They ordered a 10 ml travel size from the brand via a curated shop, used it every third morning for two weeks alongside their usual moisturizer, and logged photos. The sample proved tolerance and visible brightening before they subscribed for the full size.
Practical limitation: returns and subscriptions feel convenient but read fine print. Some subscriptions lock you into multi-delivery discounts and returning opened skincare may be impossible. If sampling is your priority, prefer sellers that explicitly sell travel sizes or have trial policies.
Sustainability considerations that affect choices and budgets
Evaluate packaging and product form together. Refillable systems and concentrated formulas reduce long-term waste and shipping emissions but increase upfront cost and sometimes require special dispensers. Glass is recyclable but heavier to ship; lightweight PCR plastics lower transport footprint but need proper recycling streams in your province.
Judgment: sustainability claims are often partial. Prioritize brands that name refill partners, publish lifecycle statements, or disclose ingredient origin. If a brand will not confirm where a refill is processed or how packaging is handled, treat sustainability language cautiously.
If provenance and reduced waste matter, start with travel sizes and refill options on a vetted marketplace like Bri's Bazaar and verify manufacturing details via the brand website or Health Canada guidance.
Practical shopping checklist and 7-step plan for switching to Canadian skincare
Direct action first: treat the switch as a small, controlled experiment rather than a shopping spree. Replace one functional pillar at a time — cleanser, moisturizer, sunscreen — and keep your proven essentials in place while you test. This reduces surprise irritation and avoids a period where your skin is overexposed to new actives.
7-step plan to switch safely and efficiently
- Set one clear goal: choose the single outcome you want (e.g., repair winter barrier, reduce redness, maintain oil control). This keeps choices simple and measurable.
- Inventory what works and what irritates: note ingredients that help and ones that cause problems. Keep a short
avoidlist — fragrance, high-percentage AHA, specific botanicals if reactive. - Select 2–3 Canadian makers to test: prefer brands that publish fill/finish locations and product-specific certificates. Use a curated site like Bri's Bazaar to narrow options quickly.
- Buy samples or travel sizes first: get small sizes of your highest-impact items (moisturizer and SPF). If travel sizes are not offered, request a decant or buy a single-use sample from a boutique.
- Patch test and stagger introduces: patch-test each product for 7–10 days on the inner forearm; add one new product to your face every 10–14 days while photographing progress.
- Track compatibility and workload: log dryness, redness, oil, and any flaking weekly. If two new products interact poorly, stop the most recently added item and support the barrier with a ceramide-rich cream.
- Decide and replace: after 4–8 weeks, keep what passed and retire duplicates. If a Canadian product fails provenance checks (no fill location, no response to a simple manufacturing question), return it and pick an alternative.
Tradeoff to accept: sampling costs extra upfront and extends the timeline, but it prevents wasting full-size purchases and avoids flares that lead to more spending. Expect to spend 10–20 percent more during the trial window for far better long-term results.
10-point practical checklist to use at checkout
- Fill/finish location: is the bottling city or facility named on the product page or label?
- Product-specific proof: can the brand produce a batch number or Certificate of Analysis on request?
- Active concentration: does the product list percentages for retinol, vitamin C, or acids?
- Sunscreen type and claim: mineral or chemical, and is broad-spectrum explicitly labeled?
- Trial/return policy: is there a travel size or clear return window for opened products?
- Shelf life after opening: look for PAO or expiry date to avoid wasted actives
- Shipping and provincial availability: any extra duties, long hold times, or cold-weather transit risks listed?
- Ingredient red flags: is fragrance, high ethanol, or strong essential oil content present if you are sensitive?
- Third-party verification: product-level certifications (not just corporate badges) are preferable
- Price per mL and refill options: compute cost-per-use and check for refill packs or concentrated versions
Concrete example: a Montreal buyer wanted a Canadian vitamin C option but kept a reliable SPF. They ordered two 10 ml travel serums from different makers via a curated shop, used each three times weekly with their usual moisturizer, and tracked photos over three weeks. One serum caused mild flaking and was dropped; the other was kept and later purchased full size, avoiding a full-size waste and a winter barrier setback.
Start with barrier support and sun protection. In practice these two choices have the highest return on investment when switching to new Canadian skin care products.
Final judgment: people over-index on novel serums and under-invest in foundations: moisturizer and SPF. If you must choose where to test first, pick a Canadian moisturizer and a mineral SPF. Everything else is secondary and safer to phase in slowly.
Resources and further reading
Practical point: Save time and reduce mistakes by using a short set of authoritative resources when you vet Canadian skincare claims and ingredients. The right combination of regulator pages, certification lookups, ingredient databases, and vetted marketplaces lets you verify provenance and safety without digging through marketing blurbs.
Authoritative sites to bookmark
- Regulatory baseline: Health Canada Cosmetic Safety — required reading for labelling rules and safety responsibilities.
- Origin guidance: Competition Bureau of Canada — explains what Made-in-Canada claims can and cannot mean.
- Clinical reference: Canadian Dermatology Association — practical guidance for persistent conditions and sunscreen advice.
- Ingredient reality check: EWG Skin Deep — useful for ingredient flags but interpret with judgment; not every flagged ingredient is disqualifying.
- Where to shop and compare: Well.ca and curated shops like Bri's Bazaar skincare collection — use these for side-by-side product pages and sample availability.
- Indie and local makers marketplace: Etsy Canada — good for small-batch options; always ask makers for GMP and sourcing details before purchase.
Limitation to watch: Public databases and badges speed decisions but rarely replace product-level proof. Certifications sometimes cover corporate policies rather than each SKU, and ingredient databases flag risks without context on concentration or formulation. In practice you must cross-check a product page, ask for batch or COA information, and confirm whether a certification applies to that specific product.
Real-world use case: An Ottawa buyer used Health Canada to confirm sunscreen labelling requirements, then ran two candidate serums through EWG for ingredient concerns. They narrowed choices on Bri's Bazaar, messaged the smaller brand to request fill-location and a batch number, and ordered a 10 ml travel size to patch test before committing to a full bottle.
Badges are signals, not proof. If provenance matters to you, prioritize product-level documentation and a prompt brand response over marketing seals.
Next consideration: After you read these resources, pick one product and run the simple verification loop: confirm SKU details on the brand page, request a batch or manufacturing facility if not listed, then buy a travel size to patch test. That sequence reduces risk and tells you which brands treat transparency as a priority.
article blockquote,article ol li,article p,article ul li{font-family:inherit;font-size:18px}.featuredimage{height:300px;overflow:hidden;position:relative;margin-top:20px;margin-bottom:20px}.featuredimage img{width:100%;height:100%;top:50%;left:50%;object-fit:cover;position:absolute;transform:translate(-50%,-50%)}article p{line-height:30px}article ol li,article ul li{line-height:30px;margin-bottom:15px}article blockquote{border-left:4px solid #ccc;font-style:italic;background-color:#f8f9fa;padding:20px;border-radius:5px;margin:15px 10px}article div.info-box{background-color:#fff9db;padding:20px;border-radius:5px;margin:15px 0;border:1px solid #efe496}article table{margin:15px 0;padding:10px;border:1px solid #ccc}article div.info-box p{margin-bottom:0;margin-top:0}article span.highlight{background-color:#f8f9fb;padding:2px 5px;border-radius:5px}article div.info-box span.highlight{background:0 0!important;padding:0;border-radius:0}article img{max-width:100%;margin:20px 0}
Further reading