Salon-Worthy Hair Gloss Treatments You Can Do at Home
Salon-Worthy Hair Gloss Treatments You Can Do at Home
Understanding Hair Gloss Treatments
You might think your hair is already as shiny as a freshly polished apple, but hold on—did you know that a staggering 70% of people aren't getting the most out of their hair color? That's right! Many folks are missing the secret weapon in their hair care arsenal: hair gloss treatments.
Imagine this: you've just come back from the salon, and your hair looks like it’s been kissed by sunlight. The color is vibrant, the shine is off-the-charts, and you feel like a million bucks. But as reality sets in, you realize that salon-fresh look fades faster than your motivation to hit the gym after a long day. Enter hair gloss treatments at home—a game changer for maintaining that salon-worthy glow without breaking the bank.
What Exactly is Hair Gloss?
Hair gloss is more than just a fancy term thrown around in salons; it’s essentially a semi-permanent treatment that adds shine and enhances color. Think of it as a top coat for your hair—much like how nail polish gives your nails that extra oomph. Gloss treatments can be clear or tinted, depending on whether you want to enhance your natural hue or add some pizzazz to your color-treated locks.
Why You Should Try Hair Gloss Treatments at Home
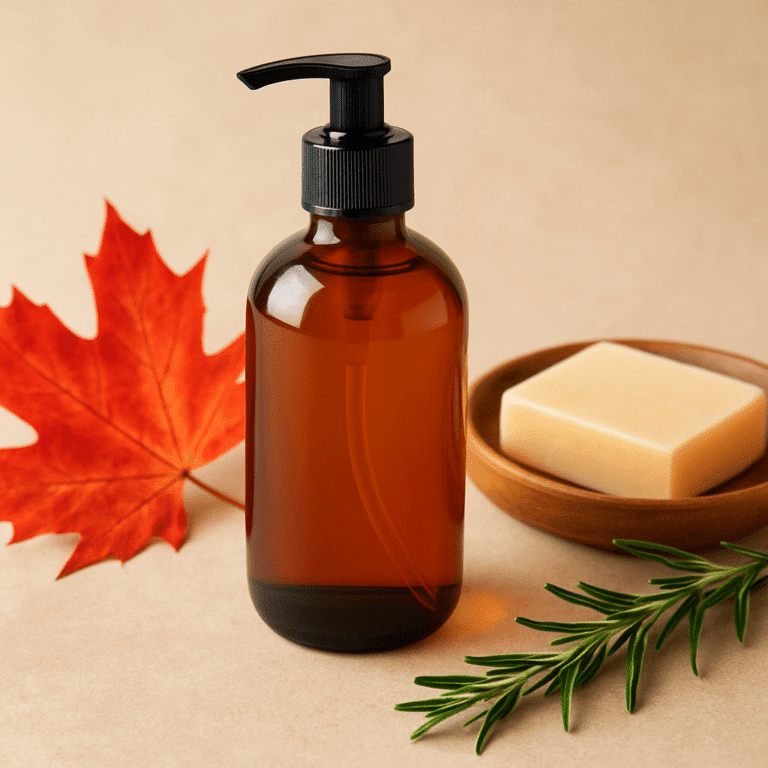
Let’s face it: life gets busy, and while we’d all love to have regular salon visits, they can be time-consuming and pricey. A DIY hair gloss treatment at home can save you both time and money while providing results that rival those of professional treatments. Plus, with products available from local Canadian brands, you can feel good about supporting businesses while pampering yourself.
- Boosts shine and vibrancy of color-treated hair.
- Helps to close the cuticle layer, reducing frizz.
- Adds hydration without weighing down your strands.
- Can be done in under an hour—perfect for those busy days!
Pro Tip: For best results, choose a gloss treatment that complements your current hair color to enhance its natural beauty.
Glossing Over Common Misconceptions
'But won't my hair get greasy or weighed down?' This is a common concern among those new to at-home treatments. The truth? A quality gloss actually works to smooth out rough cuticles rather than adding unwanted heaviness. Just make sure you're using products formulated for your specific hair type.
If you're still on the fence about trying it out yourself, remember: experimenting with at-home treatments can lead to some fabulous discoveries! So grab that gloss and get ready to elevate your hairstyle game.
You might think your hair is already as shiny as a freshly polished apple, but hold on—did you know that a staggering 70% of people aren't getting the most out of their hair color? That's right! Many folks are missing the secret weapon in their hair care arsenal: hair gloss treatments.
Imagine this: you've just come back from the salon, and your hair looks like it’s been kissed by sunlight. The color is vibrant, the shine is off-the-charts, and you feel like a million bucks. But as reality sets in, you realize that salon-fresh look fades faster than your motivation to hit the gym after a long day. Enter hair gloss treatments at home—a game changer for maintaining that salon-worthy glow without breaking the bank.
What Exactly is Hair Gloss?
Hair gloss is more than just a fancy term thrown around in salons; it’s essentially a semi-permanent treatment that adds shine and enhances color. Think of it as a top coat for your hair—much like how nail polish gives your nails that extra oomph. Gloss treatments can be clear or tinted, depending on whether you want to enhance your natural hue or add some pizzazz to your color-treated locks.
Why You Should Try Hair Gloss Treatments at Home
Let’s face it: life gets busy, and while we’d all love to have regular salon visits, they can be time-consuming and pricey. A DIY hair gloss treatment at home can save you both time and money while providing results that rival those of professional treatments. Plus, with products available from local Canadian brands, you can feel good about supporting businesses while pampering yourself.
- Boosts shine and vibrancy of color-treated hair.
- Helps to close the cuticle layer, reducing frizz.
- Adds hydration without weighing down your strands.
- Can be done in under an hour—perfect for those busy days!
Pro Tip: For best results, choose a gloss treatment that complements your current hair color to enhance its natural beauty.
Glossing Over Common Misconceptions
'But won't my hair get greasy or weighed down?' This is a common concern among those new to at-home treatments. The truth? A quality gloss actually works to smooth out rough cuticles rather than adding unwanted heaviness. Just make sure you're using products formulated for your specific hair type.
If you're still on the fence about trying it out yourself, remember: experimenting with at-home treatments can lead to some fabulous discoveries! So grab that gloss and get ready to elevate your hairstyle game.
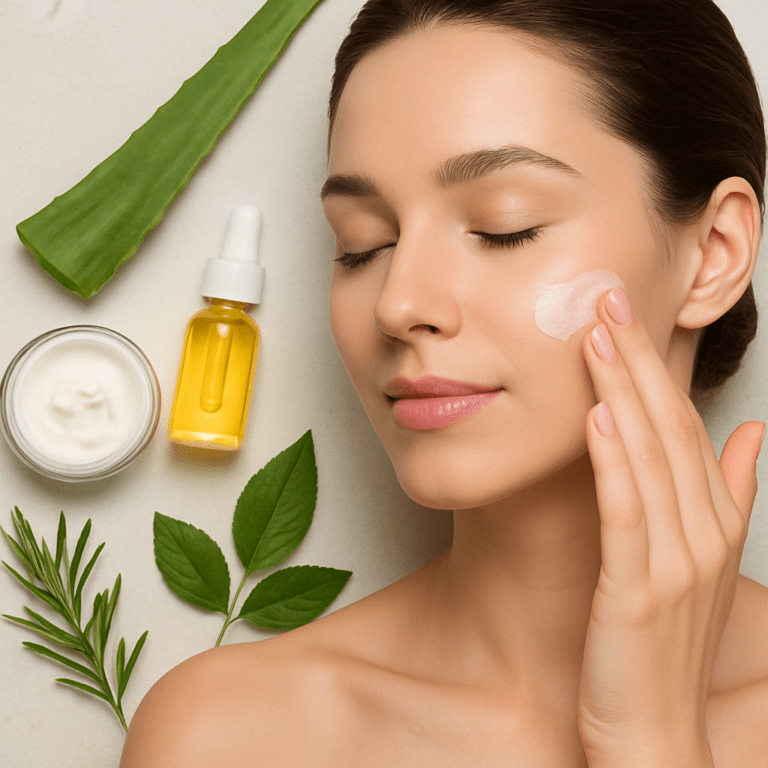
Choosing the Right Products for At-Home Treatments
Navigating the sea of hair care products can feel like trying to find a needle in a haystack—especially when it comes to selecting a hair gloss treatment at home. With brands popping up like mushrooms after rain, how do you choose one that won’t leave you looking like a greasy mess?
Know Your Hair Type
Before you dive into the abyss of product options, it’s crucial to understand your hair type. Are you dealing with fine strands that need lightweight hydration, or do you have thick, curly locks that crave moisture? For instance, a person with fine hair might want to avoid heavy formulas that can weigh their hair down. Instead, look for lighter glosses that provide shine without excess weight.
Check the Ingredients
Ingredients matter more than you think! Look for gloss treatments infused with natural oils or botanical extracts—these can nourish your strands while adding shine. Avoid products packed with sulfates and parabens; they’re the party crashers of healthy hair care. A quick scan of the label can save your locks from unnecessary damage.
Pro Tip: Always opt for products free from harmful chemicals to keep your hair healthy and vibrant.
Consider Color Compatibility
But I just want my hair to shine! you might say. While that’s totally valid, picking a gloss treatment that complements your current color is key to achieving that salon-fresh look. If you're sporting vibrant reds or deep browns, go for tinted glosses designed specifically for color enhancement. Clear glosses work wonders on natural shades by boosting shine and vibrancy without altering your hue.
Less is More Philosophy
More product equals more shine, right? Not quite! Overloading on gloss can lead to buildup and greasiness. Follow the recommended application guidelines—usually around a quarter-sized amount will do the trick for most lengths. It’s better to start small; you can always add more if needed!
Trial and Error
Don't be discouraged if it takes a few tries to find your holy grail product. Every head of hair is unique, and what works wonders for one person may not deliver the same results for another. Grab some samples or smaller sizes before committing to full-sized products—your wallet will thank you!
Step-by-Step Guide to Applying Hair Gloss at Home
Ready to transform your dull locks into a glossy masterpiece? Applying a hair gloss treatment at home is easier than you might think—and the results can be stunning! Let’s break it down into simple steps that even your cat could follow (well, maybe not the cat).
Gather Your Supplies
Before you unleash your inner hair stylist, make sure you have everything you need. Here’s your shopping list:
- Hair gloss product (choose one that suits your color and hair type)
- Gloves (to protect those lovely hands)
- A mixing bowl and brush (if required by the product)
- Comb or brush for detangling
- Old towel or cape (you know, just in case things get messy)
Prep Your Hair
Start with clean, dry hair. If you've just washed your tresses, give them a moment to fully dry—applying gloss on wet hair can dilute the effect. Use a comb to detangle any knots; trust me, you don’t want to be wrestling with tangles while trying to apply gloss.
Application Time!
This is where the magic happens!—said no one ever while applying hair products. But seriously, here’s how to do it right:
- (1) Put on your gloves and pour the recommended amount of gloss into your mixing bowl.
- (2) If needed, mix according to product instructions. Some formulas require activation.
- (3) Section your hair into manageable parts—think of it like dividing a pizza into slices (yum!). This ensures even coverage.
- (4) Using the brush, apply the gloss starting from the roots and working towards the ends. Be generous but not excessive; nobody wants greasy strands!
- (5) Once applied, give yourself a mini scalp massage for good measure—it helps distribute the product evenly.
Let It Sit Time
Patience is a virtue, they say! Allow the gloss to sit as per package instructions—usually around 10-20 minutes. You can use this time to binge-watch that show everyone’s talking about or just stare at yourself in awe at how fabulous you’re going to look.
Rinse and Shine
After waiting patiently like a saint, hop in the shower and rinse out the gloss with cool water. Avoid shampooing immediately after; just let that shine settle in! Finish off with conditioner if desired for extra hydration.
Important: Rinse thoroughly until water runs clear!
Towel dry gently—no vigorous rubbing allowed! Style as usual and prepare for compliments galore.
Customizing Your Hair Gloss Treatment Experience
Ever tried a new hair gloss treatment only to find it didn’t live up to the hype? You’re not alone! Many people jump into the world of at-home hair gloss treatments, only to be left with a lackluster finish that feels more ‘blah’ than ‘wow.’ But here’s the juicy part: customizing your hair gloss experience can turn that disappointment into a dazzling success story.
Your Unique Hair Needs
Let’s kick things off by recognizing that every head of hair is a unique snowflake—yes, even if yours is more like a snowball sometimes. Understanding your specific hair needs is crucial. For example, if you have fine, limp hair, you might want to opt for a lightweight gloss that adds shine without weighing it down. On the flip side, if you’re rocking thick, curly locks, look for a product packed with moisturizing ingredients to keep those curls bouncy and vibrant.
Mix and Match Your Gloss
Here’s where it gets fun: don’t be afraid to mix and match gloss treatments! Imagine you’ve got a clear gloss that gives your hair the shine of a freshly waxed car but lacks color enhancement. Pair it with a tinted gloss that complements your current shade. It’s like creating your own signature cocktail but for your hair! This way, you can achieve both that salon-fresh shine and the depth of color you crave.
Pro Tip: Always do a patch test when mixing products to avoid unexpected reactions.
Timing is Everything
Patience is key—a phrase we often hear but rarely take seriously when applying beauty treatments. With hair glosses, timing can make or break your results. If you’re looking for just a hint of shine, 10 minutes might do the trick. But if you want to amp up the color intensity, consider leaving it on for the full recommended time. Just remember: more isn’t always better; overdoing it can lead to unwanted buildup.
The Right Tools for the Job
You wouldn’t use a butter knife to cut steak, right? The same logic applies here! Using the right tools can elevate your at-home hair gloss treatment from mediocre to magnificent. Invest in some quality application brushes and gloves—trust me; they make all the difference in achieving even coverage and avoiding messy hands.
Incorporating these elements into your routine not only helps ensure an even application but also makes the entire experience feel more luxurious—like treating yourself at an upscale salon without leaving home.
Ultimately, customizing your hair gloss treatment at home means understanding what works best for you. So go ahead: experiment with different products, play around with timing, and most importantly—have fun while doing it! You deserve those shiny locks that make every day feel like good hair day.
Troubleshooting Common Issues with At-Home Gloss Treatments
Ever had that moment when you finish your hair gloss treatment at home, look in the mirror, and think, What on earth happened? You’re not alone! Many people experience unexpected results, from unwanted brassiness to a greasy finish. But fear not—let’s tackle these common hiccups head-on!
Issue #1: Unwanted Brassiness
If your hair resembles a sunset gone wrong—orange and brassy instead of the desired shiny hue—it’s time to reassess your product choice. This often happens with blonde or highlighted hair when the gloss doesn’t neutralize warm tones effectively.
- Choose a gloss specifically designed for color correction.
- Look for purple or blue-tinted glosses that counteract yellow or orange tones.
- Consider using a clarifying shampoo before application to remove any buildup.
Issue #2: Greasy or Heavy Hair
Did I just dunk my head in a vat of oil? If this is your thought post-treatment, it’s likely due to over-application. Less is often more when it comes to hair gloss treatments at home.
- Start with a quarter-sized amount and adjust as needed.
- Do not apply on wet hair unless specified—this can dilute the product and lead to excess oiliness.
- Rinse thoroughly until water runs clear—any residue left can weigh down your locks.
My Hair Looks Dull!
I thought this was supposed to make my hair shine! If you find yourself staring at lackluster strands after using a gloss treatment, it may be time to rethink your approach.
- 'Check that you're using high-quality products'—cheap ingredients can lead to disappointing results.
- Ensure even application—sectioning your hair properly helps distribute the product evenly for maximum shine.
- Consider the timing—leaving the gloss on longer than recommended can lead to dullness instead of vibrancy.
The right product makes all the difference!
With these troubleshooting tips in hand, you're well-equipped to tackle any challenges that come your way during your at-home hair gloss journey. So grab those products and get ready for some seriously shiny locks!
Comparative Analysis of Popular At-Home Hair Gloss Products
When it comes to achieving that salon-fresh shine at home, not all hair gloss treatments are created equal. Some products promise the moon but leave you with lackluster locks instead. Let's break down a few popular options and see which ones truly deliver on their promises.
1. The Shiny Star: Aveda's Glossing Treatment
Aveda’s Glossing Treatment is like the golden child of hair gloss products. Infused with organic ingredients, this gloss not only adds shine but also nourishes your hair. Users rave about its ability to enhance color vibrancy without any greasy residue—yes, please! However, it comes with a slightly higher price tag, so if you’re on a budget, you might want to think twice.
2. The Budget-Friendly Option: John Frieda Luminous Color Glaze
For those who want to keep their wallets happy while still achieving glossy results, John Frieda’s Luminous Color Glaze is a fan favorite. This product is designed for color-treated hair and claims to boost shine while extending color life. While it’s effective for many users, some have noted that it can leave a bit of buildup if not rinsed thoroughly—definitely something to consider if you're prone to oily strands.
3. The All-Natural Choice: Oway Glossy Nectar
“If you're all about clean beauty, Oway's Glossy Nectar might be your new go-to. This treatment is made with organic ingredients and is free from harsh chemicals—great for those who prioritize sustainability in their beauty routines. Users love the lightweight formula that adds shine without weighing down hair. However, some find the scent a bit strong for their liking, so it's worth sampling before committing.
4. The Multi-Tasker: Moroccanoil Glimmer Shine Spray
“Moroccanoil’s Glimmer Shine Spray isn’t just a gloss; it doubles as a finishing spray too! Infused with argan oil, this product promises to hydrate while providing an enviable sheen. It's perfect for those who love versatility in their products. However, be cautious with application—a little goes a long way; otherwise you might end up looking like you just dipped your hair in oil.
| Product | $ | $$ | $$$ | $$$$ |
|---|---|---|---|---|
| Aveda's Glossing Treatment | $$$$ | |||
| John Frieda Luminous Color Glaze | $$ | |||
| Oway Glossy Nectar | $$$$ | |||
| Moroccanoil Glimmer Shine Spray | $$$$ |
Key Insight: Each product has its strengths and weaknesses; choosing the right one depends on your specific needs and budget.
Ultimately, the best choice hinges on what you're looking for: high-end luxury or budget-friendly brilliance? Whichever path you choose, make sure to read reviews and perhaps test samples before diving into full-sized purchases!
article blockquote,article ol li,article p,article ul li{font-family:inherit;font-size:18px}.featuredimage{height:300px;overflow:hidden;position:relative;margin-top:20px;margin-bottom:20px}.featuredimage img{width:100%;height:100%;top:50%;left:50%;object-fit:cover;position:absolute;transform:translate(-50%,-50%)}article p{line-height:30px}article ol li,article ul li{line-height:30px;margin-bottom:15px}article blockquote{border-left:4px solid #ccc;font-style:italic;background-color:#f8f9fa;padding:20px;border-radius:5px;margin:15px 10px}article div.info-box{background-color:#fff9db;padding:20px;border-radius:5px;margin:15px 0;border:1px solid #efe496}article table{margin:15px 0;padding:10px;border:1px solid #ccc}article div.info-box p{margin-bottom:0;margin-top:0}article span.highlight{background-color:#f8f9fb;padding:2px 5px;border-radius:5px}article div.info-box span.highlight{background:0 0!important;padding:0;border-radius:0}article img{max-width:100%;margin:20px 0}
Further reading